This tutorial is a result from doing a tutorial from GreatKris called SuperBladePro Glitter Text. The tutorial header is a tag that I made following Kris' tutorial but using a different SBP preset called Etched Glass. If you would like to follow how this tag evolved, then you can read the member's discussion about Kris' tutorial on the General board here.
Before doing my tutorial, I suggest you do Kris' tutorial as she will give more detailed instructions for the non-advanced PSPer. You will need a comfortable working knowledge of PSP, SuperBladePro, and Animation Shop to complete this tutorial. I will not go into menu details etc. in this tutorial except to share the steps and settings for how I made my tag; these are my notes.
There are many steps to getting the results of this tag, so I wrote a script that I will share with you to make your tag making faster, but I suggest you go through the steps of the tutorial first to see if you might learn something new. I encourage you to use this script to experiment with this technique using different fonts and preset settings.
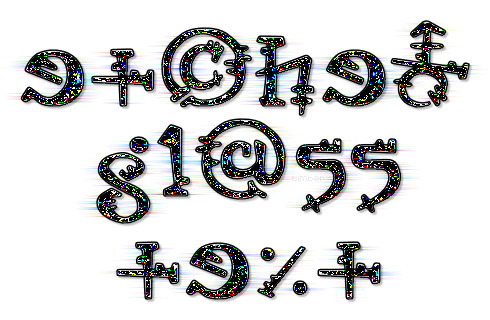
Your results will vary depending on what font you choose. From my own experimenting I discovered that I prefer fonts that have thick and thin areas and are not regular in shape or alignment. My header and tutorial samples are based on the environment graphic and texture of the etched glass preset, but you can make adjustments to the texture or choose a different environment graphic and then your results will look very different. I will include some tag variations at the bottom of the tutorial to show you some options using this etched glass preset. |
For this tutorial, you will need:
Paint Shop Pro (version 8 or higher)
Animation Shop
SuperBladePro
SBP Etched Glass Preset: let me know if you need it
A font of your choice or Orbus Bjorkus
Supplies here: place these two scripts into your Scripts-Restricted folder
tbt-EtchedGlassText PSP Script: for creating the text
tbt-EtchedGlassWind PSP Script: for creating the background |
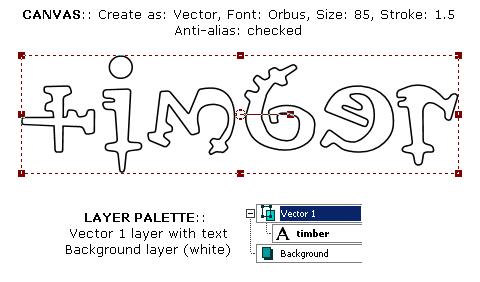
TEXT: create as vector, orbus bjorkus, size 85, stroke=1.5, anti-alias=checked
MATERIALS: FGcolor=black, BGcolor=white
- create a new image 500x200px, raster background, white
- type text; adjust kerning as desired; center on canvas;
~RUN SCRIPT: tbt-EtchedGlassText
- rename vector1 "name1"; duplicate;
- rename copyofname1 "name2"; duplicate;
- rename copyofname2 "name3"; create selection from vector;
- add new layer "shadow"; DS: 2,2,25,2,black; send layer to bottom of palette;
- name1 layer; convert to raster; contract selection by 2; SBP etched glass preset;
- name2 layer; convert to raster; SBP etched glass preset (rotate environment graphic 1 time);
- name3 layer; convert to raster; SBP etched glass preset (rotate environment graphic two times);
- layers>new adjustment layer>posterize: level=2; copymerged;
- add new layer "bg3"; paste into selection; send layer to bottom of palette; hide name3; copymerged;
- add new layer "bg2"; paste into selection; move layer down; hide name2; copymerged;
- add new layer "bg1"; paste into selection; move layer down;
- select none;
~END SCRIPT
- magic wand tool: reset to default; tolerance=1;
- bg1 layer; click in a black cluster of pixels on any letter of the text; selections>modify>select similar: reset to default, discontiguous checked; delete selection; select none;
~RUN SCRIPT: tbt-EtchedGlassWind
- bg1 layer; duplicate layer;
- copyofbg1 layer; distortion effects>wind: from left, strength=50;
- bg1 layer; repeat wind but change direction to right;
- copyofbg1 layer; merge down;
- bg1 layer; duplicate layer; layer properties: blendmode=hard light, opac=50; merge down; hide bg1;
- hide name1; unhide name2;
- bg2 layer;
~END SCRIPT
- bg2 layer; repeat wand tool selection of black pixels and delete selection; select none;
~RUN SCRIPT: tbt-EtchedGlassWind
- bg3 layer; repeat wand tool selection of black pixels and delete selection; select none;
~RUN SCRIPT: tbt-EtchedGlassWind
- unhide name1 layer and bg1 layer;
- place watermark;
- hide background; crop as desired; unhide background;
- At this point you can choose one name layer and one bg layer to unhide and save your tag as PNG, or continue on with the tutorial to make an animated tag.
 |
Animate the Text
Style #1: Animated Text Only
- choose one of the bg layers to use for the background and hide the other two bg layers;
Note: because of the rotation of the environment graphic each bg layer will have more or less color and density, so choose whichever layer you want to use for the background of your tag.
- hide the name2 and name3 layers; copymerged and paste in Animation Shop as a new animation;
- back in PSP, hide name1 and unhide name2; copymerged and paste into AS after the current frame;
- back in PSP, hide name2 and unhide name3; copymerged and paste into AS after the current frame;
- set display time to 12 (or whatever you like);
- Save as: median cut, error diffusion

Style #2: Animated Text with Animated Background
- copymerged three sets of layers (name+bg) into Animation Shop;
- set display time to 12;
- Save as: median cut, error diffusion
 |
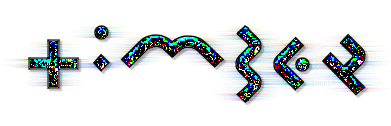
Variations
For this sample, I used the same preset but changed the environment graphic to Curacao.bmp. After completing the script steps, I applied brightness/contrast: 25/15 to each name layer to bring out more of the color and animation effect.
 
For this sample, I used the same preset but changed the font to Omikron and the environment graphic to samui.bmp. After completing the script steps, I duplicated each name layer and changed the Blend Mode of each duplicate layer to Exclusion and lowered the Opacity to 70.
I can't wait to see what variations you come up with!
See member results HERE
You may offer your results wherever you wish, but you may not sell for profit.
This tutorial was written by timber on August 9, 2018. |
|
 Post Codes
 PSP Challenges
 Smileys
 Taggy Me