|
|
| De: SilentEyez (Mensaje original) |
Enviado: 24/08/2018 05:04 |

Click the header to go to the tutorial.
If you have any questions about this tutorial, please ask them on this thread.
And don't forget to show off your results when finished!  |
|
|
|
 Primer
Anterior
2 a 14 de 14
Siguiente
Primer
Anterior
2 a 14 de 14
Siguiente
 Último
|
|
|
|
De: timber |
Enviado: 26/08/2018 20:57 |
Thanks  for another quick and easy text tutorial, Karla!  This tutorial reminded me  again of using the Background layer to use to promote a selection of white  . I had already forgotten  that tip from the last time I used it, so it was nice to have the reminder. I very rarely use the Halftone filter, but I really like the effect as I've seen it used many times on artwork, so I enjoyed  playing with it. For my tag I followed the tutorial almost to the letter except for a few changes.
I used font size=85 and stroke=1.5 (to darken/sharpen the outline).
Instead of expanding the selection by 2 and promoting the Background Layer, I duplicated my text layer, moved the layer below the text layer, and changed the stroke=7 and FGcolor=white. For this particular font, I wanted to retain the sharp corners, and when using the expand selection the corners get rounded. So this is the only method that I know of to create an expanded "outline" while still retaining the sharpness of the font corners. If anyone knows another method, then please share.
My dropshadow is 1, 1, 25, 1, black.
I have experimented a bit with using different patterns and Halftone settings, so I'll post those results in a later reply . I would like to experiment with different fonts  .  |
|
|
|
|
| Ooh! Thanks for trying this tutorial, Timber! Love your results and that you have experimented with it. I have tried it with other fonts and so far, loving it (I am hoping I will get to share some more snags soon - just do not know if I can get them done with being puppy busy lol). And so true, it does round out the edges. I hated seeing that when I would try to expand on a squared section. I really like that you have found another way to get the sharp edges to remain (^_~) ♥ P.S. Thank you for setting up the tut page for this! |
|
|
|
|
|
De: justjam |
Enviado: 26/08/2018 22:25 |
Cool tut, Karla.  I have been playing around with this tut also. Here is my first try.
I pretty much stayed to the tut but I also created my text in vector and followed timber's lead in editing the text for my white border.
I used the same drop shadow in the tut, then applied another with the V and H set at -1.
I wanted to add a small tube or image , but couldn't find one I was happy with.
I do want to play some more with different colors and settings. Thanks for the tut! |
|
|
|
|
| Oh Judy, love the added drop shadow touch! Looks fab! I will have to try the added touches the two of you done ♥
I hope you will find something to add to your taggy (^_^) |
|
|
|
|
I played around a little bit with different sizes, colors and fonts!
I love the look of these halftone name tags...this is a great tutorial.
Thanks Karla
|
|
|
|
|
| Oh Sylvia, those look amazing! Thanks for trying out the tut! Love them, hope to keep seeing more of your creations and results (^_^) ♥
|
|
|
|
|
|
De: justjam |
Enviado: 27/08/2018 17:23 |
Great tags, Sylvia. Would you mind telling me the name of the font you used for your purple tag? I love it.
|
|
|
|
|
|
De: timber |
Enviado: 28/08/2018 03:55 |
I liked the look of Karla's second tutorial example, and I was inspired by Sylvia's purple tag, so I combined the two and then threw some more stuff at it LOL. As with most of my tags this one has multiple layers and blend modes, so if you see anything that you'd like to know more about, then just let me know. Have you all been playing with the Randomizer  in the Halftone filter? I discovered I could create polka dots with this filter and I never knew that. I need to find the right font and colors and then I'll show you a polka dot tag.  |
|
|
|
|
| Oh, Timber! Love what you did there! Please do give a bit more info on your process ♥ I honestly did not see that Randomizer icon! Now I will have to play around some more with that. Woo hoo!
|
|
|
|
|
|
De: timber |
Enviado: 29/08/2018 03:13 |
I didn't add my notes for this tag before, because I thought they might have been confusing  , so I created an animated tutorial ; thanks  to Karla for showing me this cool way to share notes! Like I said in my post just above, I followed Karla's second tutorial instructions, aside from the color, and then I added an extra layer to bring out the halftone effect and then another layer for the noisy effect. So here's the Gif Tutorial. I've set the display time to view the text changes but not to read the instructions . To read the instructions, save the gif and take into AS and read . 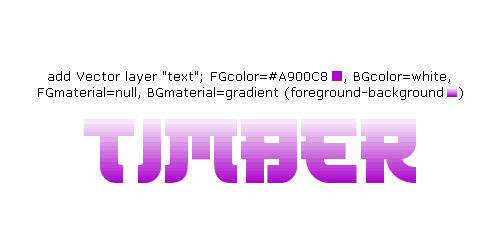 |
|
|
|
|
| That is way too cool, Timber! Thanks for sharing your animated notes! ("(^_^)/") ♥
|
|
|
|
|
|
De: justjam |
Enviado: 30/08/2018 20:46 |
|
Sylvia, I have it now.  It's a cool font. |
|
|
Primer
Anterior
2 a 14 de 14
Siguiente
Último
|
 Post Codes
 PSP Challenges
 Smileys