You may print this out for your own personal use, but please do not rewrite, translate, e-mail out, offer any part of this on any other site, add to a CD, or claim this as your own. Your finished result is yours to do with as you please, including making tags and/or snags for others. You may offer your results wherever you wish, but you may not sell for profit. This tutorial was written by timber on March 29, 2006. |
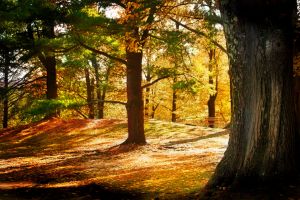 |
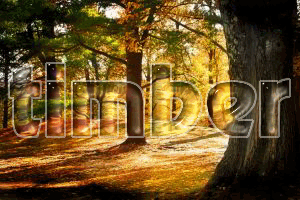
I'll use this background for my example. It's a royalty-free image from stock.xchng. |
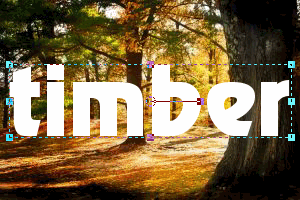 |
Now for the text, I chose a chunky font to use. I'm using Revenue size 72 (just so you can see the effect).
Although you can use floating text, I always use vector text, so I can manipulate it before I apply any effects. Either one will work for this.
 |
 |
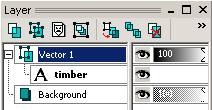
If you're using vector text, you'll need to select your text, and then convert the vector layer to a raster layer.
While your vector layer is active, go to Selections > From Vector Object (to select your text), and then to Layers > Convert to Raster Layer.
 |
 |
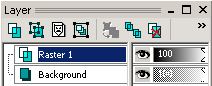
Now you want to make the background layer active and then press Ctrl+C (to copy). We're copying just the selected area from the background layer.
Now make the Raster1 layer active again and paste your copied image into the selected area.
Edit > Paste > Paste Into Selection |
 |
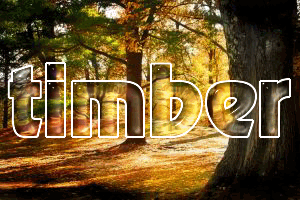
Now I applied an inner bevel to the selection. I used the inner bevel settings from Rachel's Glass Text Tutorial.
Just hop over there for the settings or use an inner bevel setting of your choice. |
 |
Then I applied the Eye Candy 3 Glass settings from the same tutorial by Rachel.
You don't need EC3 for this effect, but I like how it looks. |
 |
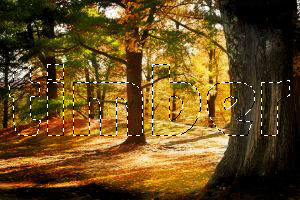
Now to make the text stand out more against the background, I added a slight halo around the letters.
While your Raster1 layer is still active, expand your selection by 2.
Selections > Modify > Expand (Number of pixels=2) |
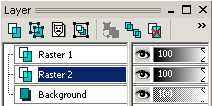 |
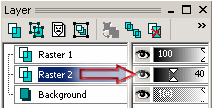
Now add a layer below Raster1.
Make your background layer active and add a new raster layer.
Layers > New Raster Layer |
 |
Flood fill this layer (Raster2) with white (#ffffff) then deselect. |
 |
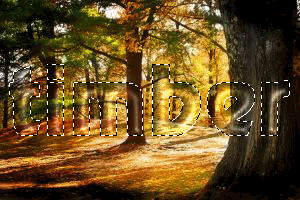
Now lower the opacity of Raster2 until you are satisfied with the look. I've lowered mine to 40.
 |
 |
Alternatively, instead of lowering the opacity, you could apply a blur to the white layer (Raster2). I've applied a gaussian blur of 2 here.
Adjust > Blur > Gaussian Blur (Radius=2) |
I'd love to see your results! 
You can post them with the other member results HERE. |
 Post Codes
 PSP Challenges
 Smileys