
You may print this out for your own personal use, but please do not rewrite, translate, e-mail out, offer any part of this on any other site, add to a CD, or claim this as your own. Your finished result is yours to do with as you please, including making tags and/or snags for others. You may offer your results wherever you wish, but you may not sell for profit. This tutorial was written by timber on September 2, 2007.
I wrote this tutorial using PSP8 and Animation Shop 3.10. Although I have included as many screenshots and details to make this tutorial easier for beginners, some basic knowledge of PSP and Animation Shop would be helpful. Unless I say otherwise, all `clicks` are with the left mouse button. I have included keyboard shortcuts for the steps in parentheses ( ).
For this tutorial, you will need:
Paint Shop Pro
Animation Shop
SuperBladePro
Coconut Ice SBP preset
Eye Candy 4000
(or Eye Candy 3)
SF Hollywood Hills font
Fireworks Animation
Although I will be using SuperBladePro and Eye Candy 4000 for my screenshots and finished tag, you can make a tag very similar to this using just Eye Candy 3 (which you can download for free by clicking on the link above). If requested, I can provide the instructions for that. |
1. Unzip and place the three Coconut Ice files (M_white_texture, M_white_pic, M_coconutice.q5q) into the environments and textures folder of your SuperBladePro folder.
Open PSP and Animation Shop (AS).
Open your font and minimize it to the taskbar. |
2. In AS, open  the fireworks animation. the fireworks animation.
File > Open (Ctrl+O)
Select all  the frames and copy the frames and copy  . .
Edit > Select All (Ctrl+A)
Edit > Copy (Ctrl+C)
In PSP, Paste As New Image  . .
Edit > Paste > Paste As New Image (Ctrl+V) |
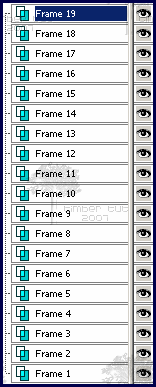 |
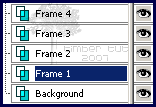
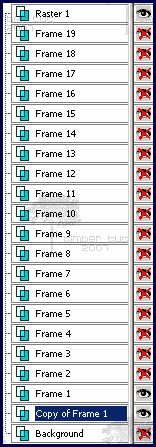
3. Rename each of the 19 layers starting with the second layer from the bottom (the bottom layer is already named) and working to the top.
To rename, right-click on each layer and choose Rename. Change the number 1 to the next sequential number and press your Enter key. Do this for all 19 layers.
(Screenshot only shows the bottom layers of the Layer palette) |
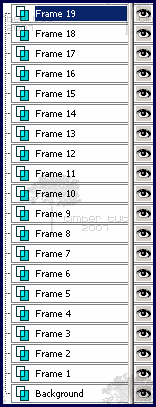 |
4. Add a new raster layer  . .
Layers > New Raster Layer
Rename it Background.

(Screenshot only shows the bottom layers of the Layer palette)
Load your Flood Fill Tool  (F) and flood this layer with white. (F) and flood this layer with white.
Send this layer to the bottom  . .
Layers > Arrange > Send to Bottom
Make the Frame 19 layer active. |
5. Load the Text Tool  (T) and apply these settings* (all other settings on the toolbar should be default settings). (T) and apply these settings* (all other settings on the toolbar should be default settings).

*If you`re using PSP 10/11/12, your text size is rendered differently than mine, so instead of using size 100, try size 133. |
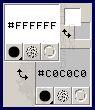 |
6. On the Materials palette, set the foreground color to #FFFFFF and the background color to #C0C0C0. |
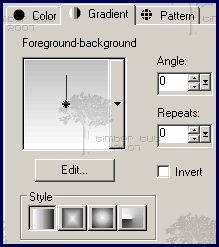 |
7. On the Materials palette, click the Foreground Material box. Click the Gradient tab, load the Foreground-background gradient, and apply these settings.
To load the gradient, click the drop-down list (▼) and select the Foreground-background gradient. Click OK.
Set the Background Material to Transparent (null).
 |
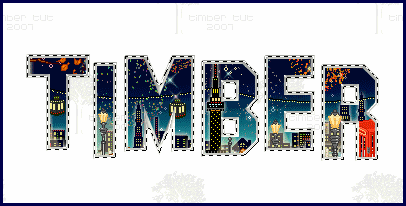
8. Click on the canvas, type your text into the Text Entry box, and click Apply.
Center the text on the canvas  . .
Objects > Align > Center on Canvas
I wanted just a bit more of the buildings to show at the bottom of my text, so I moved my text down a few pixels.
(Screenshot only shows the top layers of the Layer palette) |
9. Select the vector text  and convert it to a raster layer and convert it to a raster layer  . .
Selections > From Vector Object (Ctrl+Shift+B)
Layers > Convert to Raster Layer
Expand  the selection by 1 pixel. the selection by 1 pixel.
Selections > Modify > Expand
(Screenshot only shows the top layers of the Layer palette) |
10. Apply the SuperBladePro Coconut Ice preset.
Effects > Plugins > Flaming Pear > SuperBladePro
Click the Open Settings button  and choose M_coconutice.q5q from the list of presets. Click Open. Click OK. and choose M_coconutice.q5q from the list of presets. Click Open. Click OK.
Deselect  . .
Selections > Select None (Ctrl+D)
 |
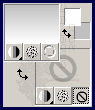
11. Load your Magic Wand Tool  (W) and apply these settings.* (W) and apply these settings.*

*If you`re using PSP9, check  the Contiguous box. the Contiguous box. |
12. Click in the area outside the text and within the holes of each letter.

Expand the selection by 1 pixel. |
13. On the Layer palette, make Frame 19 the active layer, and press the Delete key. Now make Frame 18 active and press the Delete key. Continue to activate each layer and delete the selection all the way down your layer palette until the selection for Frame 1 has been deleted.
(Screenshot only shows the bottom layers of the Layer palette)
Invert the selection  . .
Selections > Invert (Ctrl+Shift+I) |
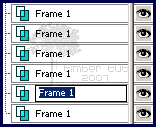
14. Duplicate  Frame 1. Frame 1.
Layers > Duplicate
Move the layer down  . .
Layers > Arrange > Move Down
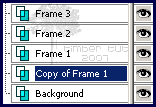
(Screenshot only shows the bottom layers of the Layer palette) |
15. Apply these Eye Candy 4000 Motion Trail settings.
Effects > Plugins > Eye Candy 4000 > Motion Trail

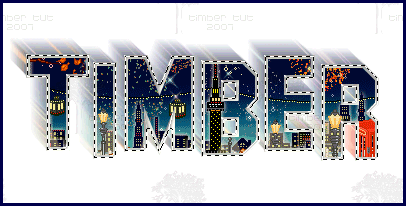 |
16. Apply these Drop Shadow  settings. settings.
Effects > 3D Effects > Drop Shadow

Deselect .
 |
 |
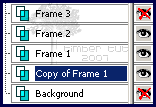
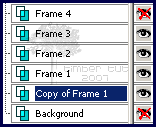
17. Hide all  the layers. the layers.
Layers > View > None
Now unhide Copy of Frame 1, Frame 1, and Raster 1.
Click on the eye symbol next to each layer to unhide.
If you would like your tag on a white background, unhide the Background layer. I`ll be making my tag with a transparent background. |
18. Copy the merged layers  . .
Edit > Copy Merged (Ctrl+Shift+C)
In AS, paste as a new animation  . .
Edit > Paste > As New Animation (Ctrl+V)
 |
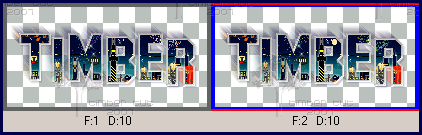
19. Back in PSP, unhide Frame 2.
Copy the merged layers , and in AS, paste after the current frame  . .
Edit > Paste > After Current Frame (Shift+Ctrl+L)
(Screenshot not actual size) |
20. Back in PSP, unhide Frame 3.
Copy the merged layers , and in AS, paste after the current frame .
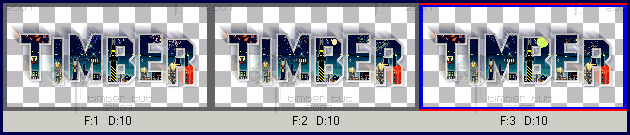
(Screenshot not actual size) |
21. Continue to unhide the layers in PSP, copy the merged layers, and paste into AS after the current frame until you have 19 frames in AS.

(Screenshot not actual size) |
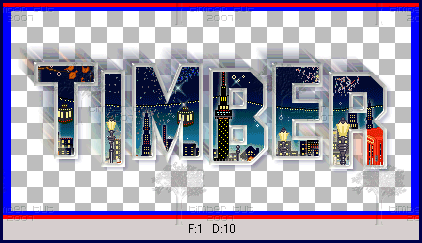
22. Crop your animation by double-clicking on the Crop icon on the Tool Palette.

Choose "Surround the opaque area" and click OK.
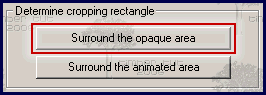
(Screenshot showing only Frame 1 of 19 frames) |
23. Double-click within the crop square to crop (or press the Crop button).
(Screenshot showing only Frame 1 of 19 frames) |
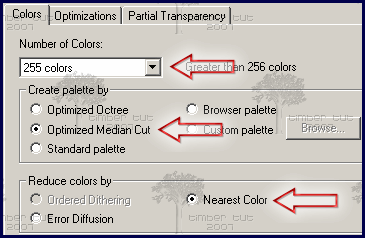
24. Save your animation  . .
File > Save (Ctrl+S)
Click on the Customize button.

Click on the Colors tab and apply these settings.
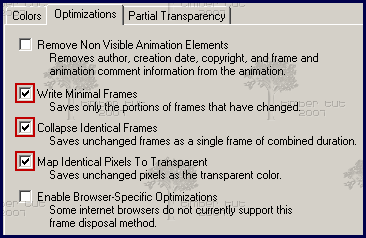
Click on the Optimizations tab and apply these settings.
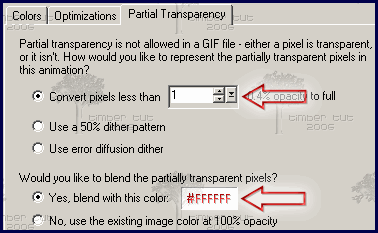
Click on the Partial Transparency tab and apply these settings.
Click OK.
Click Next.
Click Next.
Click Next.
Click Finish.
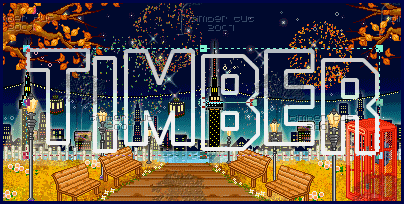
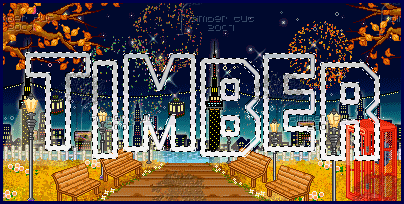
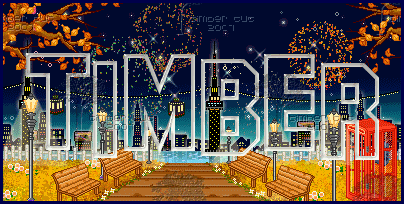
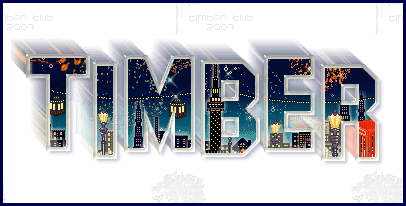
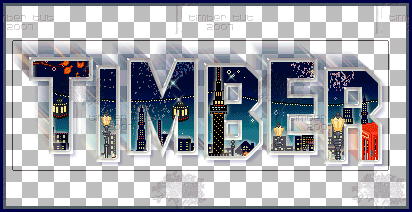
YOU`RE DONE!!!

Now double-check your saved animation to make sure that it still has 19 frames. If it doesn`t, then you have made an error in the copying and pasting process and probably have a double frame (it will be the one that has D:20 instead of D:10). |
I'd love to see your results!
You can post them with the other member results
HERE |
 Post Codes
 PSP Challenges
 Smileys