Tiny Box Smiley Tag
You will need
Paint Shop Pro and Animation Shop to complete this tutorial.
I am using PSP 8 and AS 3.
This tut can be done using other versions but, the tools may be different.
This is the tag we will be making.

You will need my psp file "spacing guide" for name Here
You will need this kolobok style smiley, in PSP form Here
You can find more about the kolobok smileys Here
You can download Aiwan's smiley kit Here
but you won't need it for this tut
The font we will be using is Tiny Box Collage bit A 12.
You can download the font Here
This download has four fonts.
The font we will be using for the tut is TINYBCBA (Tiny Box Collage bit A 12).
Now on to the tut
Open the font, TINYBCBA.TTF and minimize it to your tray.
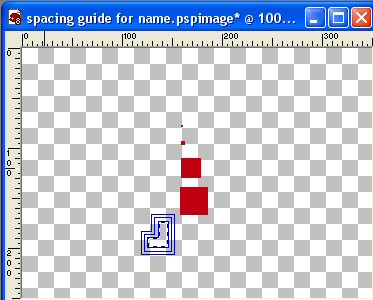
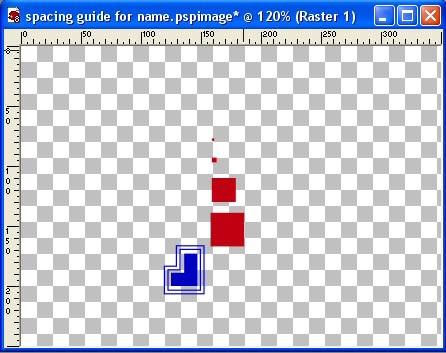
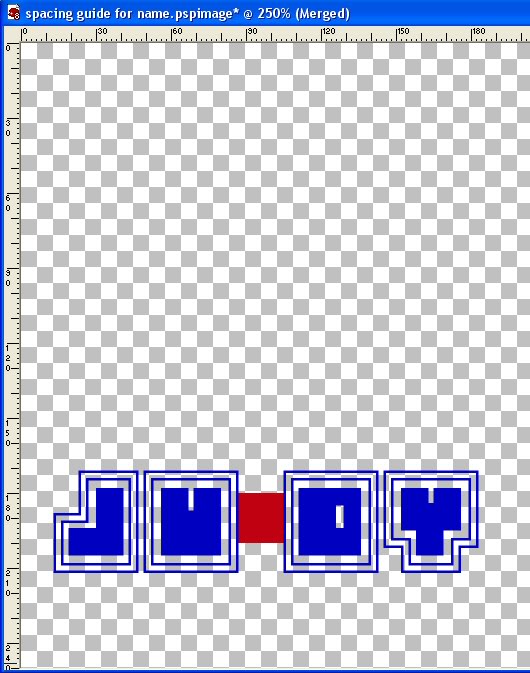
Open the spacing guide for name (my psp file) in your PSP.
You can create your tag on the spacing guide if you'd like.
It is not essential that you use it, but it helps with the space between letters.
The letter spacing is critical to creating the animated tag.
Set foreground/stroke color to # 0000C0 and background fill to None.
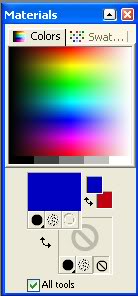
Click on the text tool "A" - select font tinybcba and set to vector, size 30,
Stroke 1, Anti Alias NOT checked.

Type the first letter of name, convert it to a raster layer.
With magic wand set to: add, RGB value, Tolerance 10, Feather 0, Anti Alias checked.

Select inside center of letter and flood fill with color #0000C0.
Move this first letter out of the way for the moment.
Click on text tool again and repeat for each letter of name.
You must create the letters one at a time so they are each on separate layers.
After all the letters of your name are complete,
line the letters up using the spacing guide provided if needed.
Each letter should have 2 pixel spaces between them.
Decide where you want to split the name (for the girl to peek through).
Hide ALL layers except the first set of letters in the name.
(the letters that will be on the left side of the girl)
Click for full-size image
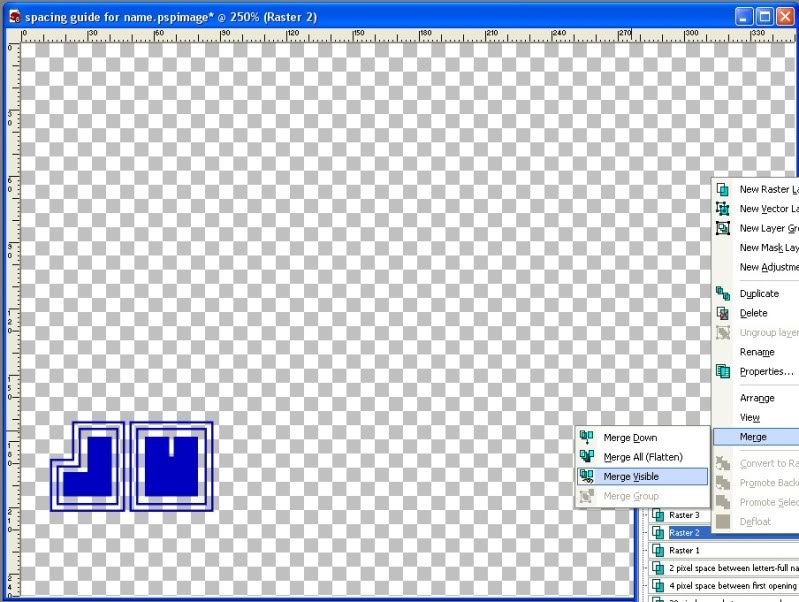
Merge these letters together by clicking on merge visible.
Hide this new merged layer and merge the letters of the last part of the name together.
One half of name will go on the left side of the smiley and one half on the right side.
There should be 2 pixel spaces between each letter and you should have only two layers of text.
One for the first part of the name and one for the last part.
Duplicate the layer with the first letters of the name until you have four total layers with these letters.
Duplicate the layer with the last letters also until you have four layers with these letters.
Hide all layers except one with the first set of letters and one with the last set of letters.
Arrange these letters so that there is a two pixel space between each letter.
Make sure all other layers are hidden and merge visible.
Move this layer to the bottom and rename it layer 1.
Unhide two more layers, one with the letters of the first part of the name and the other with the last letters of the name.
Arrange these two sets so that there are 4 pixels between the two sets.
Make sure all other layers are hidden and merge visible.
Move this layer down, make it the next to bottom layer and rename it layer 2.
Unhide two more layers, the first set of letters and another last set of letters.
Arrange the letters so that there is 20 pixels between the two sets.
Hide the other layers and merge visible.
Move this layer down to the third from the bottom and name it layer 3.
Click for full-size image
Unhide the last two sets of letters and arrange them so that there are 28 pixels between the two sets of letters.
Rename it layer 4.
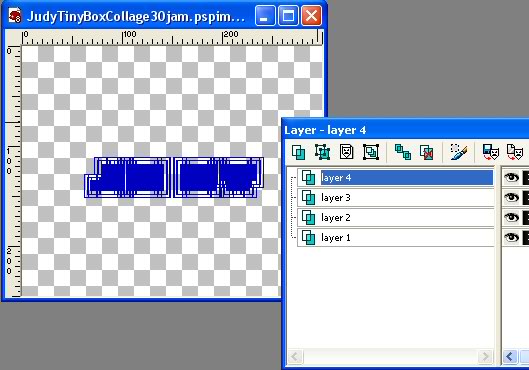
You should have 4 layers of your name and the layers of the spacing guide, if you used it.
Delete the spacing guide layers so that you have a total of 4 layers.
Make sure all layers are open and not hidden.
Arrange the name on each layer so that the space for the smiley to peek through is lined up on each layer.
In other words, as you click to view each new layer (from 1 to 4), it should appear that the name is moving outward in both directions.
Save as psp file.
Click for full-size image
In Animation Shop
Open the name file you saved in psp and my file named "opensmilie,pspimage".
Now we need to duplicate some of the layers in our name file so that we have 13 layers like the smiley image.
Click inside frame 2 to select it.
Right click and select copy.
Go to frame 4 and click inside the image to select it.
Right click and select paste after current frame.
Click for full-size image
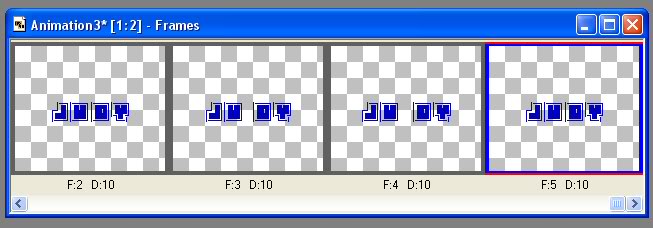
Click inside frame 3 to select it.
Right click and select copy.
Click inside frame 5 to select it.
Right click and select paste before current frame.
Next, click inside frame 4 to select it.
Right click and select duplicate selected 3 times until you have a total of 13 frames.
This is how the letter spacing should be for each frame in the final name animation.
Spacing between dividing letters for each frame:
Layer 1--2 pixel spacing
Layer 2--4 pixel spacing
Layer 3 is 20 pixel spacing
Layer 4, 5, 6, 7, 8, 9, 10, 11 has 28 pixel spacing
Layer 12--20 pixel spacing between break
Layer 13 has 4 pixel spacing
Almost finished!!
Now let's put this animation together.
Click on the title bar of the name animation to select it.
Go to edit, select all.
Make sure you can see frame 1 of this animation.
Click on the title bar of opensmilie to select it.
Make sure you can see frame 1 of this animation also.
Go to edit, select all, edit, copy.
Click on the title bar of the name animation.
Go to edit, paste in selected frames.
You will see the two blue lines from the first frame of the smiley animation on the end of your cursor.
In the first frame of your name animation, place the two lines on the outside lines of the letters that you have designated as the space where the girl will peek through.
The lines should blend into the letter when you have them lined up correctly.
You should now have a 13 frame animation with a smiley girl peeking through the name you used.
You probably want to crop your new tag now.
Go to edit, select all.
Then hit your crop button.
Click on the options button, then click on surround the opaque area....OK.
Next click on crop.
Click for full-size image

Set the frame speed for each frame as follows:
The speed for each frame is:
1. 400
2. 10
3. 10
4. 100
5. 10
6. 10
7. 50
8. 10
9. 60
10. 15
11. 60
12. 10
13. 10
Click on view, animation to see how your tag looks.
When you are satisfied with your animation, go to file, optimization wizard and use these settings:
Click on customize button, put a check by Optimized Median Cut and error diffusion.
Click on the Optimization tab and remove all check marks.
Save.
I hope this tut was easy enough to follow and I'd love to see your creations.
Let me know if you have any problems or questions.
Here are a couple of extra smileys to play with.
They have a different number of frames so you will need to account for that when you make your tags.
 
I'd love to see your results!
You can post them with the other member results
HERE
This original tutorial was written by justjam on February 23, 2012.
Any similarity to any other tutorial is coincidental.
Please do not claim it as your own, pass it around in groups or post to any other location.
You may print out a version for you own use. |
|
|
 Post Codes
 PSP Challenges
 Smileys