***MY FIRST TUT WOOT WOOT***
Ok now that that is off of my chest....here we go, ya ready????
Mind you, this tag was completely from my imagination.lol Any similarities to another tutorial are purely coincidental! Also the font I used, I can not find anywhere....so I am putting it in the supplies. I am assuming it is a free font.
Filters & Supplies you will need are:
General Knowledge of PSP (I am using PSP X for this tutorial)
Alien Skin Eye Candy 5 Impact
Alien Skin Xenofex 2 Constellation
Toadies Blast 'em
Xenofex 2 Shower door.
Silver gradient of your choice, and Koushin font.
Click here to download.
To start- Open a 600 X 500 canvas with a white background (I always start with this size, it gives you plenty of room to work & you can always crop/ resize as you need)
Now that you have your canvas open, you need to make a new raster layer. To do this go to; Layers>New raster layer. On this layer we are going to make the "Chrome text layer"
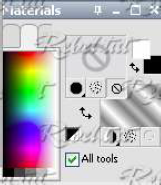
Select your text tool of course, choose your Koushin font. ALL CAPS. Size it to your liking, depending on the size of your name. We are going to create this as a "Vector" so that you can make your name taller. Have your silver gradiant as your fill & your stroke set to null. Anti-alias: Sharp.
Now that you have your silver text layer, I need you to go to Layers> Convert to raster layer. Next we are going to select the text. So that we can apply the eye candy chrome filter. To do this go to Selections> Select all> float> Defloat.
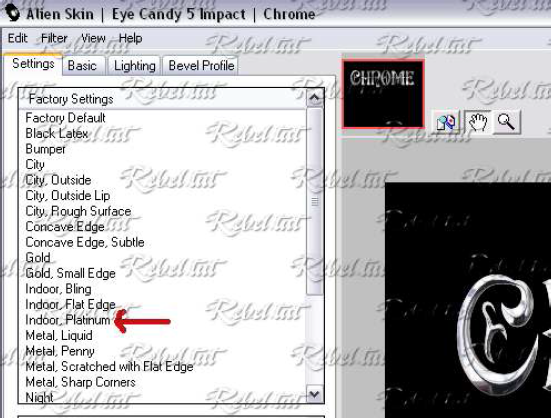
Next we are going to apply the chrome effect. Go to your Effects> Plugins> Eye candy 5 Impact> Chrome> Indoor, Platinum. Wow thats pretty huh! LOL
Ok...Now that you have your chrome effect on your text, while the marching ants are still on your text, I want you to go to selections> Expand> by 2 pixels. Now that you have expanded the selection, you need to make the blank layer below your chrome text layer active. Click on it on your layer palette.
What you are going to do now is select your stroke color, change it to black. Then flood fill the layer you have selected with black. This will give your chrome text a black outter egde. Which is what we will be adding the constellation to later on. Now you need to go to Selections> Select none.
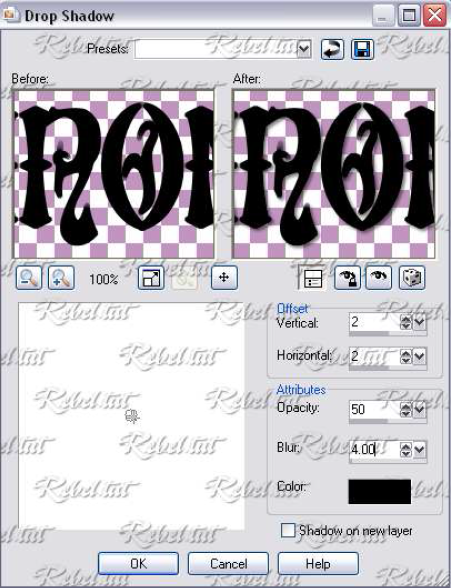
While your black text layer is still active we are going to apply a drop shadow. Use the settings below, or one to your liking.
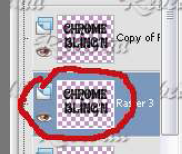
Now that we have our drop shadow, I want you to duplicate this layer. Go to Layers>Duplicate.
Click on the bottom black text layer to make it active.
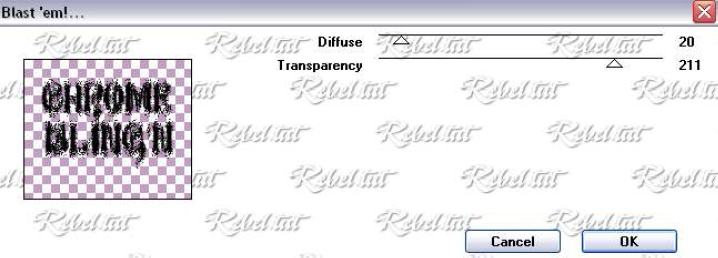
Before we start applying the filters make sure that your color fill is set to WHITE so that you get a good effect from the toadies blast 'em.
We are going to apply 2 effects to this layer of text. The first being the Toadies>Blast 'em. With the settings below. I want you to do this twice.
Now you need to make sure its completely black, so we are going to change the hue & saturation. Go to Adjust> Hue & Saturation> Colorize. Set the Hue at 0 & the saturation at 0.
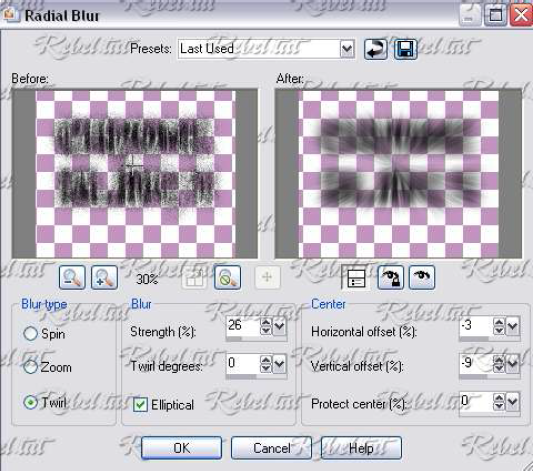
Now that you have done your blast effect twice we are going to apply a radial blur to it. To do this go to Effects> Blur> Radial blur. Apply the blur settings below.
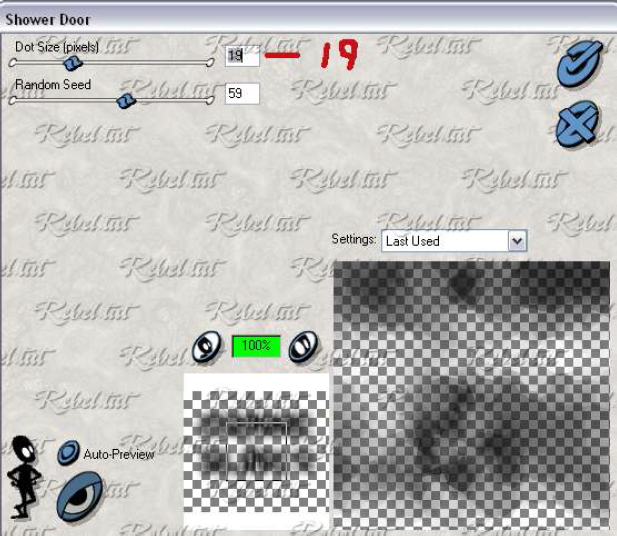
Now that we have done the radial blur, we are ready to apply the Xenofex Shower door effect. With the settings below, although depending on your text size, you may want to play around with the random speed, so that you dont have any outta place dots.lol
Now isn't that looking awesome! Great job so far!
Add any copyright information/ your watermark at this point.
Guess what....You are ready to add your animation!! Woot Woot!
I need you to make the "Top black text layer" beneath the chrome layer active so that we can add the constellation effect. You can click on it in your layer palette to make it active.
Please note: I do not animate like alot of other tutorials...so if you know what your are doing at this point, & you wish to do the constellation effect your way, that is fine. You need 3 frames for the effect.
On to my way...lol
Crop any access off of your tag, making SURE not to crop off any of the shower door effect. You don't want a square background do you? LOL
At this point I want you to MAKE sure that the right black text layer is active. Hit shift+D 3 times. This way you have 3 frames (well looks like 3 tags in your psp.lol) Since you did it 3 times you will also have an extra one just incase you mess up.LOL *Wink* Plus if I was you I'd save that one. You never know when your psp will flip out on ya.
Ok...Enough babbling. On to adding the constellation.
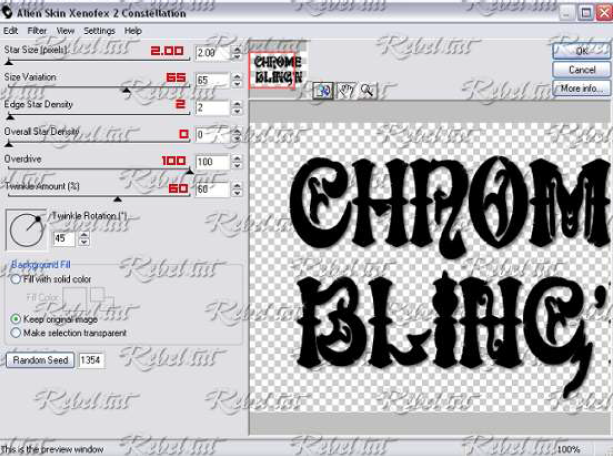
On your first one, I want you to again make sure the black text layer is active. No need to X out all of the other layers. Just as long as you click on the black text layer. Now we are going to apply the constellation. With the settings below. Go to effects>Xenofex 2> Constellation.
Once you have applied the affect go to Layers> Merge visible. Now we are going to save this first frame. I always save mine as Temp1. Make sure if you are using a version of psp that requires you to save as an psp animation file, to save it as that, otherwise when you open your wizard, it wont recognize your files. So on your save box, where you choose gif, jpeg, png, make sure that you choose psp animation shop file.
**Make sure to put all 3 Temp files together in the same folder where you save them.lol, you will have to grab them in the animation wizard***
Do the same thing on the next one. Only changing the random speed of the effect. Save as temp2.
Do the same for the third one. Only changing the random speed. Save as temp3.
Now we are ready for animation shop!
We are going to use the animation wizard to animate your tag.
Yes to me this is the easiest way.LOL If its not to you & you know another way, by all means do it, if you have general knowledge of PSP & animation shop.
Open the animation wizard.
Follow the instructions on the steps below;
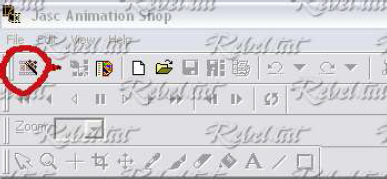
Same size as the first image> Next; Transparent> Next; Upper left corner of frame, with canvas color, & put a check in scale frames to fit. Next> Yes, repeat the animation. How long? 15. Next> You are going to add your images. Click add image. Find the file you saved your 3 temp files in, select each of them. Click next> Finish. Up in the tool bar, click the other little banner that says view animaton, to make sure your tag is animated right. Once you have checked that. Its time to save!!!
Woot Woot!!! Excited aren't ya...hehe
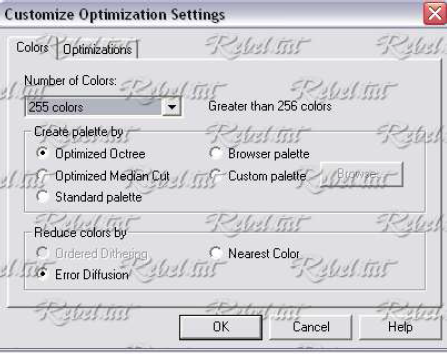
Click File> Save as> name your tag> click on customize & use the settings below.
Click ok, then just keep on clicking Next until its done saving and
Thats it! All done!!!! Wow, that was easy enough huh?
I hope that you have enjoyed my VERY first tutorial.
Thank you for giving it a try! Don't forget to post your results.
You can click here to post your results!
XOXO

This tutorial was writtin by Rebel on September 20, 2008.
Any similarities to another tutorial are purely coincidental!
Do not copy or reproduce my tut in any way. |
|
 Post Codes
 PSP Challenges
 Smileys