You may print this out for your own personal use, but please do not add to a CD or claim this as your own. You may offer your results wherever you wish, but you may not sell for profit. This tutorial was written by timber on June 4, 2018.
I wrote this tutorial using PSP8 and Animation Shop 3.10. I will provide you with the layered PSP image that I use when I make my tags and the script that I wrote to make my tag making faster. If I had more time I would write more detailed instructions, but I'm so busy these days that I will be taking shortcuts and doing most of the work for you. If you would like to learn more about my technique or the script that I wrote, then don't hesitate to ask.
For this tutorial, you will need:
Paint Shop Pro (version 8 or higher)
Animation Shop
Supplies Folder HERE includes:
Blackout Font
Underwater Background Animation
My layered PSP file
My PSP script |
1. Place the BlackoutSceneTut050415b script into your Scripts-Restricted folder.
Open PSP and Animation Shop (AS).
Open the font and minimize it to the taskbar. |
2. In PSP, open the BlackoutSceneTutorial-050415b-layers file.
Make sure the Frame 14 layer is the active layer. |
| 3. Set the Foreground and Background Materials to color=white. |
4. Load the Text Tool, reset to default, and then apply these settings:
CREATE AS=Vector
FONT=Blackout
For the SIZE setting, I use size=100 for PSP8, but for higher versions of PSP you may need a higher number. The size number is not that important as we will be deforming the text anyway.
STROKE=0
ANTI-ALIAS is UNchecked (this is important to get nice crisp edges on the font) |
 |
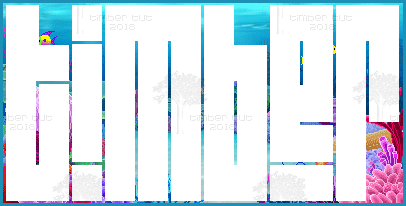
5. Type your text.
For this font I use a combination of lowercase and uppercase letters. The uppercase letters have an underline, so I use uppercase for the vowels. Use the combination of letters that you like best.
Center your text on the canvas. |
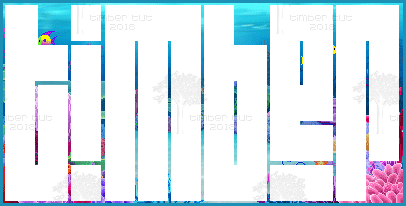 |
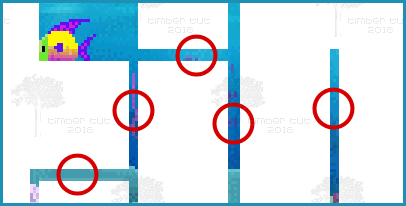
6. Stretch the text.
Click-and-drag the left handle of the vector text to the left to stretch the font to the left. Do the same with the right side of the text as well as the top and the bottom of the text until the text fills as much of the background as you would like. The portion of the background that is not covered by the text will be removed when you run the script. |
| 7. Now that the text is stretched in all four directions, convert it to a raster layer. |
Optional
These steps are optional, and may be too detail oriented for some, but I like how it gives the text even spacing, so I'll explain what I do.
After stretching the text the spacing between the letters and around the letters may no longer be uniform as it is when you first type it. I use a combination of the Brush Tool, Eraser Tool, and Selection Tool to make the spacing around each of the letters uniform.
Most of the letters have a "gap" in them that is usually between 2-5 pixels. Whatever that number of pixels is, I make sure that is the number of pixels for all the gaps in the letters, the gap between a letter and its underline, and the gaps between the letters. |
 |
For the gaps between the letters, I usually use the Selection Tool to select around a letter(s) to move the letters closer or further apart.
Selection Tool settings: selection type=rectangle, mode=replace, feather=0, anti-alias=unchecked. |
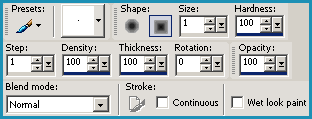 |
I use the Brush Tool to add pixels of white to close up any too-large gaps.
Brush Tool settings: shape=square, size=1, hardness=100, step=1, density=100, thickness=100, rotation=0, opacity=100, blend mode=normal, continuous=unchecked, wet look paint=unchecked. |
 |
I use the Eraser Tool to remove pixels to widen any too-narrow gaps.
Eraser Tool settings: shape=square, size=1, hardness=100, step=100, density=100, thickness=100, rotation=0, opacity=100. |
If I have two or more vowels next to each other, then I will fill the gap of the underline between the vowels to make it a longer solid underline. I have done this for the 'o' and 'u' in the tutorial header above.
For any letters that have an extra long "leg" like the letter 'r', you can select around a portion of the letter and delete the selection. I have done that with the 'r' in my name.
Re-center your text on the canvas. |
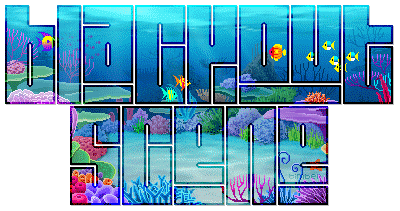
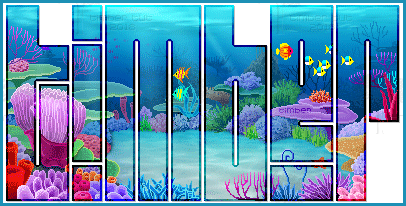
8. Now you're ready to run the script.
Make sure your text (Raster 1) is active.
Load the BlackoutSceneTut050415b script.
Run the script and watch many minutes of work be done for you in seconds LOL.
Using a script will not teach you the steps that were performed in the script, so I will explain them briefly for anyone who would like to know the steps.
make frame 1 active; copy;
make raster 1 active; select all-float-defloat; hide layer; invert selection;
make frame 14 layer active; delete selection on each layer all the way down the palette to frame 1; invert selection; make raster 1 layer active;
add new layer; paste into selection; contract selection by 2; delete; change blend mode to darken;
duplicate layer; change blend mode to burn; select all-float-defloat;
make outline layer active; unhide; invert selection; delete; invert;
make drop shadow layer active; 1,1,100,1,#C1C1C1; select none.
|
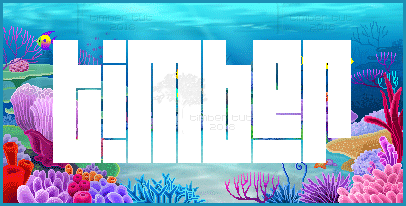
9. Add your watermark if you like.
I have left an empty watermark layer on the canvas that you can use. For my watermark I use a pixel font, color=#808080, and set the blend mode to burn. |
| Animate the Text |
10. Hide all the layers.
Now UNhide these layers: drop shadow, frame 1, raster 2, copy of raster 2, outline, watermark.
Copy merged and paste into AS as frame 1. |
11. Go back to PSP and unhide frame 2.
Copy merged and paste into AS after the current frame.
Go back to PSP and unhide frame 3.
Copy merged and paste into AS after the current frame.
Continue these steps for all 14 frames. |
| Crop and Save the Animation |
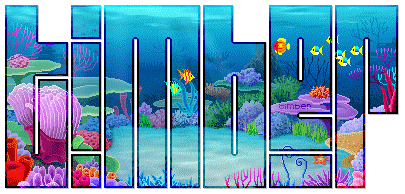
12. In AS, you should have 14 frames of animation.
Crop your animation as you like.
Set the display time of the frames to 20.
Save your animation using optimized octree and error diffusion on the COLORS tab.
Note: After you have saved your animation, look at the number of frames that it has. You should still have 14 frames of animation. If you have 13 or less, then it means that you have copied one of the frames from PSP twice, so you have an error. If this is the case, then repeat steps #10-11.
If you have the 14 frames, then view your animation, and if all looks good, then you're finished!
I'd love to see your results!
You can post them with the other member results
HERE |
 Post Codes
 PSP Challenges
 Smileys