|
|
| Da: timber (Messaggio originale) |
Inviato: 01/02/2012 02:07 |
Timeless
I found this tutorial through the Wayback Machine, and all the screenshots seem to be visible at this time. The download links for the diamond accent and the font are working.

I liked this tutorial because it uses the Effects/Texture Effects/Tiles filter. I don't see this filter used often, so it's nice to see a way in which it can be used.
The Inner Bevel settings used in the tutorial are hardly noticeable when applied to black text, so I applied a different Inner Bevel setting to add dimension to the black text.
The bevel settings that I used are from my Melted Candle Text Tut; click here to see. Even with the different bevel settings, I hardly noticed the bevel (maybe it's my monitor settings). So I applied Eye Candy 4000 Glass filter. The Eye Candy settings that I used are also from the Melted Candle Tutorial and you can see those here. If you use the glass settings, first reset all tab settings to the factory defaults and then apply the glass settings. If you apply the bevel twice, it's much more noticeable.
Since I like color, I added a New Raster Layer above the glassy black text layer and filled the selection with #0B3D91. I applied the same bevel and glass settings to this layer. Then I added another New Raster Layer and filled the selection with #C00000 and set the Blend Mode to Soft Light. I added another New Raster Layer above this layer, filled it #404040 and applied the Tiles filter as in the tutorial. I lowered the opacity of this layer to 50. I made the glassy black text layer active and added a Drop Shadow (3,1,25,3,#404040). I chose size 55 for my text so I only resized the diamond accent tube by 85% Bicubic (the bicubic setting adds some sharpness to the image when resizing). After resizing the diamond accent I applied Sharpen. For the animation, I changed the frames per second to 5fps (this gave me 5 frames of animation rather than 7). Then I changed the Display Time of the animation to 27.
I made another tag with some slight variations.
Instead of setting the Blend Mode to Soft Light for the #C00000 layer, I set it to Difference and lowered the opacity to 50. It creates a sort of two-tone effect.
For the diamond accent, I sharpened twice after resizing. I applied the diamond accent to each letter of the text. For the letters B and R, I deleted the largest size diamond then moved the other bits into position. All the other steps and settings are the same as described above.
|
|
|
|
|
|
|
Da: timber |
Inviato: 01/02/2012 21:05 |
 Aww, see... you haven't lost your touch at all, JessieJo! That tags looks beautiful!  Although I love to see red around Valentine's day, I usually forget to create with it. I guess I'm more drawn to the cooler colors of purple, blue and green. I guess that makes me cool   LOL. Is that a brush that you used for the swirly art? It's a beautiful touch, and I gotta say that I love that you added the diamond accent around the swirls and animated them too. It's a really beautiful tag, I love it!  Thanks for playing and for sharing all the notes of how you made your tag!  |
|
|
|
|
|
Da: JessieJo |
Inviato: 02/02/2012 00:49 |
Thanks Timber, I appreciate your kind words. Myself I'm really feeling a loss of creativity. That doodle is a very long time ago scrap doodle for a site that is no more. I did play with it as it was very large. It had dots where I put the diamonds. I personally would not have thought of it other wise, so my hats off to the doodle creator. I do love text tutorials and this one was very nice. Thanks again for the opportunity to play!  |
|
|
|
|
|
Da: Cheetah |
Inviato: 03/02/2012 20:12 |
timber: Thanks for the tutorial - this was nice and easy ... your tags are both beautiful - I like the second one because the color is brighter and the animation is softer (?) .. JessieJo: Beautiful tags - I like the pattern you used and the doodle also ... Here is mine - after filling it with the pattern I colored it and also colored the diamonds ...  |
|
|
|
|
|
Da: JessieJo |
Inviato: 03/02/2012 22:13 |
Cheetah I'm hoping your tag is a snag? Nice work. I like the diamonds colored. They have a very softness to them. I'm glad you liked my doodle.  |
|
|
|
|
|
Da: timber |
Inviato: 03/02/2012 22:58 |
 Ohhh... it's such a joy to see when you all put your own "spin" on how you complete a tutorial. I love the variety of the tags and seeing examples done slightly differently. Cheetah, your snag is beautiful! I never thought to color the diamonds, but that's a great idea; thanks for the tip! Thank you for the compliment! I agree with your opinion; I like my second tag more, too  . |
|
|
|
|
|
Da: nonniedeb |
Inviato: 05/02/2012 14:36 |
I did this tutorial a long time ago. I like the effect, so I wanted to try something a little different. If ya look really really close ... there's a shimmer in the coins on the name. Thanks for posting this oldie but goodie timber ♥  |
|
|
|
|
|
Da: timber |
Inviato: 05/02/2012 17:37 |
 Omigosh, Debbie... you've come up with another great way to do this tutorial! I just can't say it enough; I love seeing how you all complete the tutorials differently in your own way. It's so inspiring to me! What a great pixel tag! I love that you changed the diamonds to coins. And it's an unexpected pleasure to see pixel images so large; I'm more used to seeing the small ones. Thank you so much for the pressie, I love it! |
|
|
|
|
|
Da: Cheetah |
Inviato: 07/02/2012 17:32 |
Debbie - this is a beautiful tag and a great idea to animate the coins ... Lovely ...  |
|
|
|
Rispondi |
Messaggio 13 di 19 di questo argomento |
|
|
Da: timber |
Inviato: 10/07/2021 17:51 |
I've been going back through old tutorials and I found this one and saw how faded the color on my sample tags above is. When I made my tag samples I had a much darker monitor, and now most of my older tags look shockingly drab to me   . So I gave this tutorial another play. I was going to remake my sample tags so they looked like they did on my older monitor, but that didn't happen. I get to playing with settings and blend modes  (I love blend modes), so another tag was born  . I think it looks like a bedazzled lizard  LOL. 
For this tag I used #0B3D91 for my text fill (rather than black) and applied the inner bevel and Eye Candy 4000 Glass settings from my Melted Candle Tutorial. Above that layer I added a soft light layer with #C00000 (this creates the purple in the text). For the Texture Tiles layer I used the same settings as the tutorial except I changed the size to 18. I set the blend mode to Difference and lowered the opacity to 74. The difference blend mode creates the two-tone effect. I added an outline with stroke=1.5 and a drop shadow (3, 3, 25, 1, #404040).
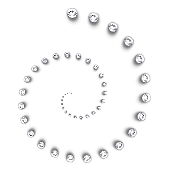
Instead of using the gems provided by the tutorial I used this bling spiral by GxChic. I moved the spiral over each letter and flipped or mirrored the spiral as needed until I got the four diamonds for each letter that I wanted. For the animation, the tutorial calls for "short" waves, but I made all my waves longer for these diamonds. I changed the frames per second to 5fps (this gave me 5 frames of animation rather than 7). |
|
|
|
Rispondi |
Messaggio 14 di 19 di questo argomento |
|
Wow!!! I have no idea why I have never seen this tutorial page before (eek)  It is so gorgeous and blingy!!! I love everyone*s results ♥ Timber, your newest result is totally lizardly bedazzley! Yes, had to make up some words there lol It is so gorgeous and blingy!!! I love everyone*s results ♥ Timber, your newest result is totally lizardly bedazzley! Yes, had to make up some words there lol
|
|
|
|
Rispondi |
Messaggio 15 di 19 di questo argomento |
|
|
After my previous post, I went ahead and gave this a try. I did not use the same settings for the Bevel so I had to do a little tweaking on layers to sort of keep it similar. The font I used is called DrumagStudioNF and it is at 92 pt.
I like how it turned out but the "A"s are missing some bling. I did not want to bother trying to adjust accents (you know, lazy) lol
I certainly will give this another try and use different fonts ♥
|
|
|
|
Rispondi |
Messaggio 16 di 19 di questo argomento |
|
|
KismetNF @ 102 pt
Colorized @ 131/255 and enhanced color 4xs
PSP Noise Effect
This time, I used her Bevel and Texture Tile settings.
|
|
|
|
Rispondi |
Messaggio 17 di 19 di questo argomento |
|
|
Da: timber |
Inviato: 11/07/2021 18:08 |
Oh, Karla, I love the Deco fonts that you're choosing . Did you think to rotate the gems 45 degrees for your first tag? After rotating I would think you could Sharpen if needed. I love the color variation you got for your second tag!  When you colorized your tag, did you colorize the Tiles layer?  That's a perfect font for these gems, love it. Thanks for giving this tutorial a play, sharing your settings, and posting your results!  I loved seeing your new tags!  Here's another tag from me. The Tiles layer is hard light.  |
|
|
|
Rispondi |
Messaggio 18 di 19 di questo argomento |
|
| Oooh, love your recent taggy!! I will download the Zyborg font so that I can try it out and also use the swirl bling too :)
I will look back to see if I colorized the tile layer or the original text layer. Who knows, maybe I merged the text layers and colorized lol |
|
|
|
Rispondi |
Messaggio 19 di 19 di questo argomento |
|
|
DrumagStudioNF @ 82
Accents for "A" were Free Rotated @ 24
In Animation Shop, I rotated the accents (to R or L, does not matter) and added the Underwater effect. I then rotated back to original position (opposite of what you rotated it to). I just wanted to see if there was a difference in the effect animation (lighting). Looks like there is ;)
Frame speed is set to 20.
Timber, my PSP keeps crashing and in one of those times, I lost the work for the colorized one. Sorry ♥
|
|
|
 Primo
Precedente
5 a 19 de 19
Successivo Primo
Precedente
5 a 19 de 19
Successivo
 Ultimo
|
 Post Codes
 PSP Challenges